The Timeline panel, located at Monitoring > Timeline in the WinGate Management console, contains the actual Timeline which is used to display user web activity and various system events as they happen over time.
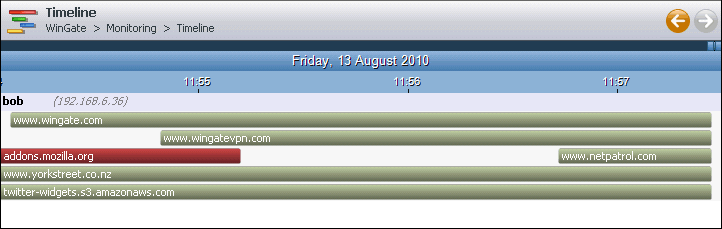
When a client makes a request to a web site on the Internet through WinGate, their web activity will be recorded as a series of colored bars on the Timeline. Each time a user accesses a new site, a new solid bar of a chosen color is created indicating an active session. The bar length grows progressively along the Timeline as their activity at the site continues. As such, subsequent requests to that site during this activity helps to maintain the activity bar growth along the Timeline. In the example below the active activity bars are shown in green.
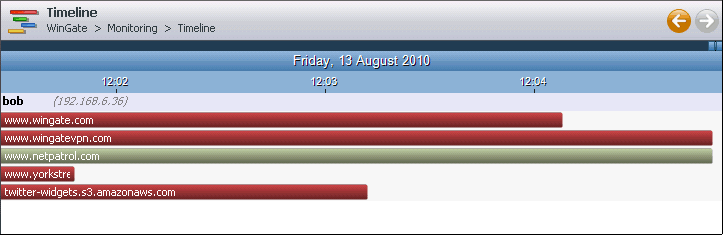
When no more activity to that site is received during the inactivity time period set in the Timeline settings, WinGate will deem that the user is no longer active at that site, and so will stop the growth of the bar. When an activity bar is deemed inactive, it will also change color to indicate that inactive state. When viewing web activity on the Timeline, the inactive color helps to distinguish between activity that is current, and activity that has ended.
In the example below, the activity at WinGate.com has changed to red indicating an inactive state, while the user is still active at the netpatrol.com site.
An activity bar is created whenever a user browses to new site. So it is possible that a users entire activity at any point on the Timeline will be made up of numerous bars, indicating the different requests that can be automatically made during the course of normal browsing. This can include situations when a visited site will call other sites as part of loading a page (e.g. Google analytics, Verasign during HTTPS etc.).
When the same user browses to a new site, the new activity bar will begin on the same level as any inactive bars they may have that are still visible on the Timeline. In the example below the user begins to browse www.yorkstreet.co.nz. The activity bar for this begins on the same line as a previous inactive bar (www.wingate.com).
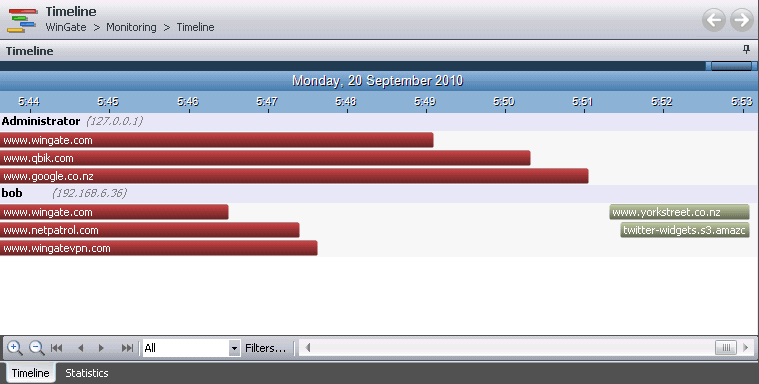
This is done to allow for the entire display of a users current activity to be kept at a reasonable size depending on where it is on the Timeline. It also facilitates the activity from multiple users to be tracked and displayed on the Timeline in comprehensible manner. In the example above, the Timeline displays web activity for two users (Administrator and Bob).
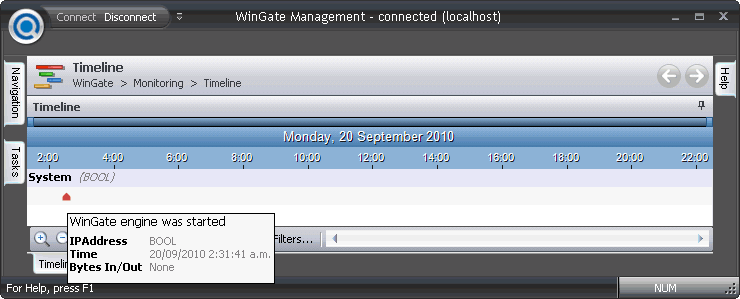
When certain events take place during WinGate system activity, such as the WinGate engine being stopped or restarted, they will be displayed as markers on the Timeline. These event markers provide easy reference for Administrators when they are checking to see what time these system events occurred (as shown in the example below).
The Timeline provides various levels of detail about user web activity and the occurrence of system activity. Since all tracking is recorded to a database, historical records can be kept and viewed whenever you open the Timeline panel in the WinGate Management console.
The Timeline allows you to focus the view of which time period should be displayed in the Timeline panel. This allows you to zoom in for a minute by minute display, or zoom out to display activity across numerous days. The scope of time that is currently visible in the Timeline panel can be changed by using the Magnification buttons on the Timeline Navigation bar.
The Timeline Navigation bar at the bottom of the Timeline panel provides magnification (zoom in and zoom out) buttons to control the scope what part of current view will be displayed on the Timeline panel.
The Timeline Navigation bar also provides navigation buttons so you can have the focus of the Timeline instantly jump to the beginning or end of the scope of the tiime period currently in view (regardless of what magnification is set). Alternatively, it allows you to move to the beginning or end of the entire Timeline.
Using the scroll bar at the base on the of the Timeline panel, or moving the Timeline control (at the top of the Timeline panel) to the left or right, allows you to go back and forth along the Timeline from the start when the timeline was first enabled, to the end (current time). This is regardless of what level of zoom you have set on the timeline control.
You can create filters for viewing different types of selected information on the Timeline. You can choose which view filter the Timeline should use to display information from the Timeline Navigation bar at the bottom of the Timeline.

You can use basic Full-Text Searches against the page title and body to find matching articles. Use the following search modifiers to refine your query: