In Step 2 we dragged all the policy items required for the policy on to the worksheet, and configured the properties for each one. The next step is to construct the flow chart of how the policy will be processed by connecting the policy items together.
Select the Event policy item on the worksheet and place it in the top left hand corner. Since all policies are triggered by the occurrence of a selected event, the event item must be present on the worksheet and connected as part of the flow chart. It is always the first policy item in the flow.

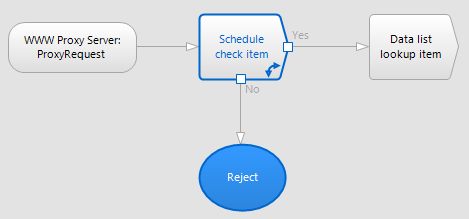
Select the Schedule check policy item that you placed on the worksheet, and drag it just to the right of the Event item. On the right hand side of the Event item select the output connector and drag the arrow to the center of the Schedule check. Release the mouse, and an arrow will appear connecting the Event item to the Scheduled check. This means that when the WWWProxy Server:ProxyRequest event occurs it will process the Schedule check first.

Position the Data list lookup policy item to the right Schedule check policy item. With your mouse, left click the Yes output connector of the Schedule check item and drag the arrow across to the center of the Data list lookup item.

Drag the Result policy item that has been configured as the Reject result for the Schedule check, and position it underneath the Schedule check.
With your mouse, left click the No output connector of the Schedule check and drag the arrow down to the center of the Reject result. This means now that if the request is within the defined hours of the Schedule check the policy will move on to process the Data list lookup policy item. If the request is made outside the defined hours, the policy will process the Reject policy item ending the policy evaluation.

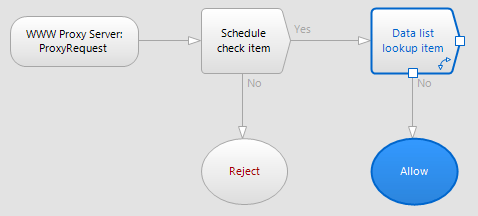
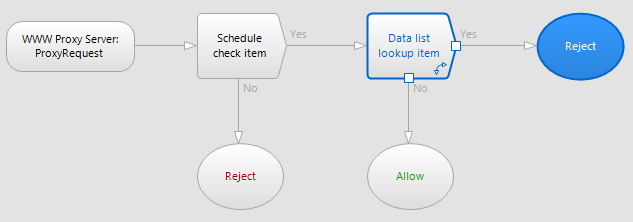
Drag the Result policy item that has been configured as the Allow result underneath the Data list lookup item. With your mouse, left click the No output connector of the Data list lookup item and drag the arrow down to the center of the Allow result policy item.
Since the Data list lookup decision will be checking to see if the requested URL is contained in a list of blocked sites, a No result will send policy processing to the Allow result policy item. This will allow the clients proxy request to continue and end the policy evaluation.

Drag the final Result policy item that has been configured as the Reject result for the Data list lookup item, and position it to the right of the Data list lookup policy item. Position your mouse over the Yes output connector of the Data list lookup item and drag an arrow to the Reject result.

©2012 Qbik New Zealand Limited
no comments yet...
You can use basic Full-Text Searches against the page title and body to find matching articles. Use the following search modifiers to refine your query:
You can create a new account or reset your password at forum.wingate.com.
